
CARUSO PRECISION
AFTER ACTION REPORT
_________________________________________
Caruso Precision
Advanced Competitor Class @ Gravestone Precision, Lipan TX
Dates: April 11-12, 2026
Instructors: Matt Caruso & Dale Rhodes
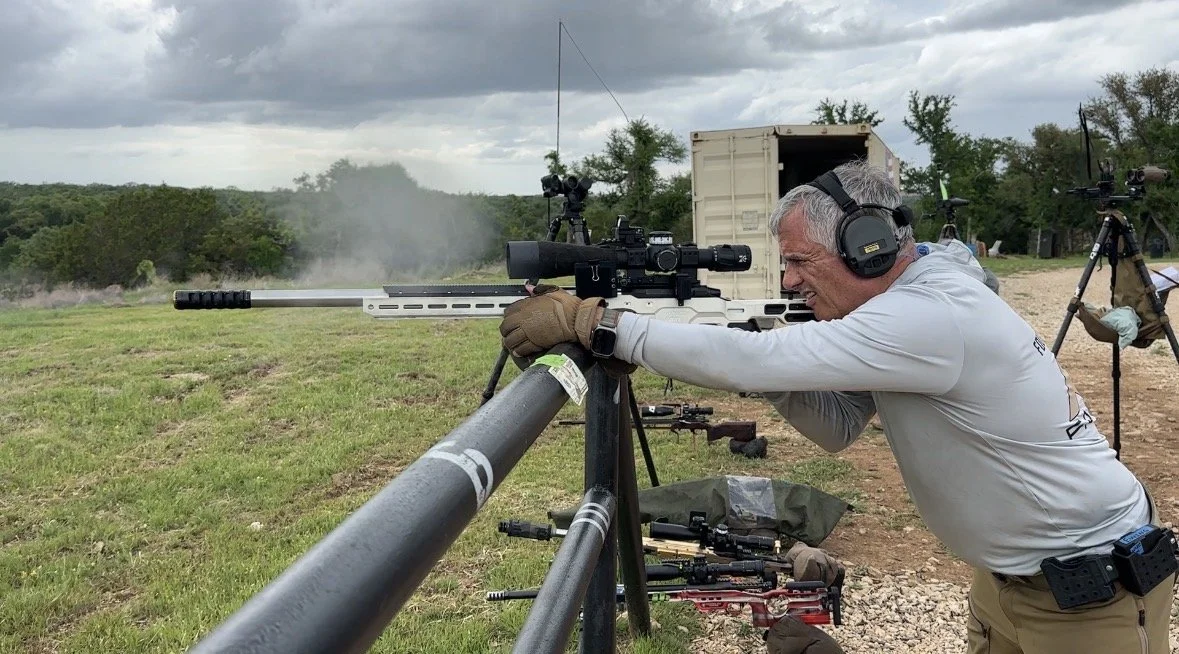
Student: Lee Ewing
Purpose: Assess performance, provide live critique, feedback, corrective actions, and develop personalized training plan
SUMMARY:
This report provides a comprehensive review of the recent training class and match weekend, drawing from multiple sources of insight and performance data. Trainee feedback was actively collected and analyzed to understand their individual perspectives, challenges and takeaways. Additionally, I’ve incorporated my own instructor observations gathered throughout our time together, with particular focus on engagement, progression, and skill application during drills, exercises, and match conditions.
Performance in the match setting was critical to assess how effectively the trainee executed learned skills under pressure, and to identify any recurring gaps or strengths in real time. Taking this all into account, I’ve developed a personalized training plan for each individual. These plans are informed not only by the data collected during the course, but also by my own personal experience as a competitor and an instructor.
The goal moving forward is to ensure that each trainee continues to build on their strengths while systematically addressing areas for growth using methods that are practical and tangible. All training elements have been tested and yield a form of measurable results. Training means more than identifying problems but offering no solutions. This plan is a practical guide for the next steps in achieving your goals. If anything in this report is not clear or requires further explanation, please reach out.
OVERVIEW:
Thank you again for joining this class! It was very rewarding to watch you connect the dots and make progress throughout our time together. Each trainee comes to the event with varying levels of skills, abilities, strengths, weaknesses, and how much room they have to grow. In addition, everyone learns at their own pace. That said, you may have walked away with one little insight, several huge breakthroughs, or something in between. No matter what, this training was not an ultimate solution, but a place to better equip yourself as you continue on your journey. Everything you picked up, changed, validated, or completely rebuilt will need to be practiced and worked to get the results you’re striving for; the work is not done!
We reviewed basics, enhanced fundamentals with advanced techniques, refined sophisticated skills such as movers and tripod operation, as well as dissected deep cerebral topics such as spotting and wind reading. We exercised drills to lock in specific muscle memory, and also to expose you to new concepts. Topics the class asked for and were covered were:
Wind
Spotting
Positional Techniques
Tripod Techniques
Mental Planning & Stage Prep
Smart Corrections
After each topic was covered in class setting, we took it to the firing line to hone in on the physical skill and techniques behind each topic. I was happy to see everyone participate even when the guidance didn’t necessarily make sense or seem significant at first. As an advanced shooter, there are some philosophies and simple concepts that are staples for progress, for ALL. A few of the mantras throughout the training were:
“Small changes can make large improvements” – lots of the teachings are subtle differences that can significantly clean up your execution, giving you better first round impacts, spotting, consistency, etc.
“Pause” – As simple as it is, this is often the critical missing piece to consistent performance. Rushing through the process may work for a while, but eventually you will face an issue and likely moved too fast to properly manage it.
“Slow down and process what just happened” – Similarly to the one above, this focuses on the follow through in the shot process. Are we actually watching with an attentive brain as we make the shot? Or are we just waiting for the bullet to land so we can quickly cycle to the next shot?
We covered a LOT of material. As we discussed in class, not every insight needs to be incorporated into your process, but take as much as you can and see what yields the best results. No matter how our 2 days unfolded for you, the goal is to take what we covered, combine it with some pointed critique, and propel you on a guided path forward toward your next goals. Let’s get into your personal report!
SHOOTER GENERAL:
Lee, it was great to have you come through again. I can tell you’ve put in some work since the last class, so I’m confident that there will be some good progress in the wake of this one. Obviously you come with a vast level of experience and understanding, and we will be working to iron out your execution. Overall, you know what to do, but there are a couple hurdles (small but significant) that are slowing you down.
Between your dedication to learning, your mental awareness and understanding, and lastly, you general skill behind the rifle, I don’t see you having too much trouble making good headway toward your targeted areas of improvement. As in most cases, it’ll come down to putting in the time, breaking a few habits, building a few new ones, and not falling back into previous grooves from the years of prior experience. Let’s get into it…
STRENGTHS AND SUCCESSES:
Self-diagnosed Pre-Training Survey:
Consistently Perform Well -
You have enough years under your belt to have seen most things, and tend to do well. You generally know what you’re up against, have a good toolbelt to address the challenges, and have a good understanding of what you can expect out of yourself.
Instructor Observations:
Fundamentals-
I can see good improvement even from the last class. Recoil management was better, and it looked like you were managing the bag much more assertively in positional situations. The intentional bag movements have a lot of cascading benefits and I can see how it’s helped. You build solid, fundamentally sound positions, and know where to go without much thought. There were few, if any, opportunities where I had to adjust a fundamental action.
Improved Efficiency of Movement-
Another area you have made gains in since our last class! You are much quicker to get into positions, and make a good shot without being too casual or wasting time. The side stage spot-correct drill showed how much more efficient you have gotten, being able to build, shoot, spot, correct, and impact within 7 seconds - that’s about as good as it gets! Positional is your strong suit, and this may have been lacking in prone style applications; we’ll address that coming up.
REFINEMENT OPPORTUNITIES:
Self-diagnosed Pre-Training Survey:
Getting Old –
This is always a funny but understandable answer in the surveys! Unfortunately we are all working against the clock in more ways than one. You are correct by default, you ARE getting older lol… In all seriousness I understand and agree that this likely contributes to some of your struggles causing some additional hurdles. The good news is that they’re usually manageable in some way, and there are certainly some rockstar seniors keeping up with the young bucks.
As we did last time, we will work through some ways to catch back up despite age, and find gains like last time. I think you can recall when we addressed your speed was a partially a choice, and then next thing you know you are moving VERY well now.
Instructor Observations:
Mental vs Physical Pace–
This is a bit of a tough nut to crack given that one of your biggest goals is to keep up, and move a little faster. The issue I see, is that in chasing that high gear, you start to make more mistakes. At the end of the day, as you already know, a high pace is only good if it’s a pretty clean execution. You ARE very capable of quick engagements, but the main deciding factor I identified was the factor of complexity.
When the stage is more on the simple side, but demands high efficiency, you can keep up pretty well and hit those high gears we’ve been striving for the last year or two. When the stage is more complex, your mental focus becomes higher priority, rightfully so… At this point, it becomes a game of whack a mole for you. As it stands currently, it seems like you can manage high speed movement, OR high speed mental work — but if you try to move fast AND try to manage a complicated scenario, the train comes off the track.
A couple different scenarios I saw this:
Simple: Side stage with taped turret>moved fast, mentally kept up…
Simple: 100 yard dot drill>moved fast, made it within the tight timeframe where most actually could not…
Medium: Near/Far Stage on Pipe Fence>with multiple distances and positions, you started to make little hiccups with dialing sometimes before/sometimes after moving
Complex: Mover/Troop/Tac Table stage> obviously more to think about, but when close to being saturated, momentum drops off and you get hung up on more little stuff.
Take this with a grain of salt as I know you were fighting an uncomfortable set up, and I know you probably stopped caring about time at that point and just wanted to figure it out. That said, there were a couple other times I can’t specifically recall that seemed to get you a little jammed up. If you went too fast, you’d make some bigger mental errors. If you focused on getting it right, you would slow down quite a bit.
SOLUTION
The quickest and safe answer at first, is that you need to choose accurate execution over speed — that will prevent the mental mistakes, and I would prefer timing out over poor misses any day.
The next solution is PLANNING and REHERSAL before the stage. I believe we discussed this last time, and it is the best way to grease the mental wheels. I’m sure you already do this, but I think you need to do it MORE if you can. Repeatedly go through the stage, mentally and with pretend physical movements, imagining getting into position, “three tenths left, boom boom, dial, move to THIS spot here, six tenths, big small, dial and move…”
It may not be fun, and it may seem like you’re all good after thinking through it once, but I strongly suggest you work through this process several times if the opportunity allows for it. Don’t be afraid to get in front of people, get close to the prop, and mentally run through the positions, targets, dialing, wind holds, and verbalize what you’re doing out loud as you go.
I know you’re working through the Cadence app, but hopefully you can get that ironed out so it’s a smooth background function and not all time consuming. If it’s always a distraction, you’ll likely have to choose where you want to put your energy, either working the app, or mentally preparing for the engagement.
Rear Bag Execution -
This is arguably more important than the first topic mentioned above. I’ve actually heard and seen others having a harder time with this than expected, so I know you’re not alone. The simplicity of a single fulcrum and anchor point on a positional shot is easy, where two anchor points and a rear-steering setup can be clunky. I know with your amount of time behind the rifle you certainly know how to do it, but I think under time constraints you aren’t 100% comfortable, and quickly get frustrated chasing a better setup. I wasn’t there to see the tires stage, but I remember the tac table mover stage. There were some obvious issues you were fighting, but additionally I think you made it hard on yourself at the same time. At this stage, there’s no reason you can’t get to the point where you plop a rear bag down, make it work, and get to shooting quicker. That stage stopped you dead in your tracks and we can change that for next time. There are a few suggestions to make it easier:
Bag Choice - using a sand bag is no doubt more stable, but it is also much harder to manipulate. It will take longer to get right, reduce your ability to adjust quickly, and can corner you in a bad position while fighting the clock. I strongly suggest you use a light fill rear bag until you get more comfortable here. The important thing to realize and remember here, is that you can easily squeeze or relax the height in/out of a light bag, but it’s the same principles on the heavy bag. With a heavy bag, you just have to be much more disciplined and assertive with adjustments. For example, even in a light bag, if you need height after you get in the bag and realize it’s not right, you still have to partially lift the buttstock up to allow the squeeze to reshape the bag, and replace the rifle down to try the new position. This is true with the heavy bag, but you must LIFT the rifle out of the bag more, give yourself the full freedom to make strong and large adjustments with the bag, and then reset the rifle. I saw you trying to make tough corrections with your bag hand, while the rifle was still weighing it down. Keep this in mind as you go back and forth with the light/heavy bags.
Bag Height - Obviously you can have too much or too little bag causing too high or too low depending on the situation. If you have a light bag, I prefer to start with a good plump amount in my hand, leaning toward the too-much side of things. It’s easy to relax the hand and cut down through it if you need to muzzle-up. If it’s too low and you have to squeeze a light bag, you end up on a small/skinny peak of fill, and due to it’s reduced stability (from fill principles), you can see some pretty good wobble as the rifle is barely being supported.
If you use a heavy fill bag, I like the opposite - I tend to be okay with a little too low. If it’s low, I can lift the rifle, fluff the heavy bag, and ease back down, tightening my grip when we’ve settled into the right height. If the bag has been squeezed small and tall to get high enough, I can feel pretty good about it in the heavy fill. It is usually still very sturdy and stable even with small amounts of contact to the rifle. If it’s too tall, it can be very tough to cut down through it, and you can easily screw yourself as you fight through a compressed sand bag.
No matter what, you need to:
Know when the bag height it TOO high or low and needs to be flipped or completely reset.
Slightly lift the rifle pressure out of the bag to make quick and effective bag manipulations.
Level Of Expectation - Ever hear of “don’t miss the good while chasing great?” This is similar to the point you mentioned from our previous class, where I said sometimes there are times when you can chill out on how perfect you’re trying to be, such as a big target with no small target next. In this case, my personal expectation for a good rear bag position must meet two things
First, it must be a stable reticle - if it’s wandering or bouncing, I don’t have a good enough bag support
Second, I passively and mentally interrogate if the amount of bag is enough, and/or if there’s enough firmness in the bag to support recoil
SO, it must be enough to make a good shot, and provide good follow through
Ideally, you would have perfect stability, and a completely enveloped buttstock that is fully supported for zero movement under recoil. However, in a live engagement with other pressures, I don’t chase that too hard. I look for a solid supported position that I know won’t screw me. Then let it rip! One way to make sure you don’t get too sloppy with this is to still try to make your final rifle/bag adjustment down into the bag - this ensures you’re not unnecessarily floating. So my default rear bag setup is to start slightly muzzle below the target, and as I settle the rear down, I muzzle up onto my final point of aim. Be quick and assertive with this, even more so with heavy bags.
TO SUM IT ALL UP:
Light fill is quicker and easier, especially for now
You must lift the rifle to relieve down-pressure for an easier bag adjustment
Light bags should start pretty tall in your hand, allowing for a saw-down
Heavy bags should be medium to low height so you don’t get stuck unable to get lower, easy to lift rifle, fluff bag, squeeze as you lower rifle in a saw-down
With any bag, try to make the rear slightly tall before your final settle, so you end with sufficient downward contact into the bag
VIP VIDEO SUGGESTION
5:30 into the video I discuss bag manipulations. There a few things that may sound contradictory, but it’s very scenario based. Rewatching this may put more context on the explanation above. I speak about having more back for a sturdy position even with sand, but this is a non-dynamic situation, so it’s a little different.
https://www.carusoprecision.com/vip-core-skills/v/prone-shooting
Reading Hits Correctly On The Plate–
Like myself, you see your misses pretty good, but have a harder time precisely analyzing your point of impact on target. I did notice multiple times you hit the big plate, and it gave a good read, but you misinterpreted it, and took a backwards correction to the small plate next. This is a common challenge for many, and I still have to pause and be careful of this today. We walked through some deep visual interpretation on plate reading, and I suggest you review those again closely to your next trip out. Ideally, you will read through the different spotting cues right before you shoot so you are prepped for success. No matter what, your plan of attack here is work over time. This is the toughest skillset to nail down, and the answer is simple - but not necessarily easy. You need to make this a major focus on all your trips out, and take a methodical approach to EVERY shot. I’ll attach the drills later, but basically take normal shots, and take all the time you need to process it before taking your best guess to the small plate for a test. You WILL get this wrong, sometimes a lot. Over time however, you will get better. This is a long game, and you need to avoid getting discouraged. Even the best top shooters misread impacts, often more than they admit.
Rooftop –
We spoke about managing the rooftop valley choke point… with the valley on your left, it is easier to pan left, so you are pushing the rear of the rifle away from the roof into free space. Panning right has you pulling the rear of the rifle toward you and the valley where you are getting into a more constricted position. In this scenario, where the roof valley was on the left, targets panning to the right, I personally just start my first position with the rifle/bag further in open space to begin with. It’s slightly less ideal for a truly sound fundamental position, but allows me to make a few shots out there with less support, but as the targets get further and pan right, I have enough room to pull the rifle into my body and the valley.
A more technically correct answer would be to start fundamentally sound, and as you pan right and get constricted, each target would warrant a slightly new rifle/bag position. I’ve done this too and it’s not a big deal — simply shoot target one, and then lift and shift the rifle/bag a couple inches away from you, so you can pull the rear back in without running out of room. Each further-right target, move the anchor point slightly further away. If you’re not wasting time getting perfectly comfortable or acquiring the target, this is very easy and will feel much better. If you’re worried about timing out, you may want to just start further away from the valley, shoot a couple less supported shots, and rotate into a more comfortable and compact position as you pan right.
TRAINING PLAN:
Your overall skills are solid and at this point it’s all about a defined path forward. I know you don’t just aimlessly go to the range and shoot without purpose, but to hone in on this stuff, you really need to focus your efforts here. A big suggestion is while working the cadence app development, separate a couple hours of range time to not overlap the priorities. Shoot for you first, then work the side project. Let’s target your goals, and put your energy in the right places to get you measurable results.
The following section is a combination of range-day timeline AND items to work on. Take these things and try to incorporate them in a compounding way that will stack benefit on top of benefit. This is designed to give you maximum results in the areas of improvement you need.
RANGE DAY ITINERARY:
1. Review forecast before going – come up with a guess of min-max wind hold you’ll need at say 800 yds.
2. At Range - Check zero/chrono/adjust kestrel.
3. Drills – start with the cold wind call at distance.
4. Work through other drills in this plan, and don’t be afraid to add/substitute what you need.
5. Mid day, when the wind has the most potential, stop your other drills and repeat a full wind analysis, ending in another semi-cold call at a farther target.
6. Take notes! Record yourself — the amount you can learn watching yourself like an armchair quarterback is incredible…
DRILLS:
Cold Wind Call:
EVERY TRIP OUT, make this your first plan after checking zero. The hard part of this drill is that everyone loves the satisfying feeling of hitting every hundred or so, validating data. But you can do that later! The other challenge is that there’s nothing on the line, it’s not a match, so it’s easy to jump the gun and get impatient.
Don’t rush, take in every detail, study the area, and average your wind across the field of fire.
Finalize your call, and take a poke.
Hit or miss, reverse out of the shot and analyze what you could have seen better.
See if there is a single indicator you could’ve used during the shot sequence that would’ve been the best source of information.
DON’T SKIP THIS STEP - This is where the learning happens!
It’s a long term gain, sow progression drill. Things won’t necessarily change overnight, but it’ll take the already solid wind calling you have, and help you start to hone in on more specific details.
A second level drill would be to switch to only doing this on the rifle
Give yourself a few minutes tops, then one minute, then make your first shot within 20 seconds.
800+ yards is fine, does not have to be 1000…
Efficiency Drill 1:
Using this standard drill mainly to iron out your bag stability improvements and check for complete equipment control throughout…
Think of the build and break drill from the class
15 seconds, then 12 seconds, then 10 seconds…
Pick a standard target - .4 wide, non-painted steel preferred
Sturdy prop, different positions available. Pipe fence was a great example
On the clock, build a swift and complete position, and shoot 2 shots on target
Bag down, rifle down
Drive it forward while lining up barrel to target
Settle QUICK AND FIRM into the bag as you acquire target in scope
Mag well buried into bag for rudder support
Forcefully and abruptly sawed/shimmied into position in target area
Finish building connection behind rifle
Make final shimmy onto exact POA
Push out a breath as you close the bolt
Hyper focus on target, make the shot!
Spot, RESET in the bag, cycle another round, make second shot!
6. Evaluate your progress on building an effective position quicker without compromising fundamentals.
Strive to have a solid grip, saddle the rifle against your body when making big movements, and be aggressive with your strength in managing the rifle – You are in charge, not the rifle!
7. Choose another time limit, and repeat
Spotting Drill 1:
Initial several shots until you have lost the element of surprise and know your wind call well enough that you confidently know where your shots are landing and where the next ones are GOING to land. Next phase will allow you to re-introduce the element of surprise to make your brain have to analyze the point of impact again from a fresh perspective…
Start on completely sturdy props and use un-painted steel
Use a big/small array, maybe a KYL Largest and then Smallest (or one of the smallest)
Make perfectly stable and bag-settled position
Take several seconds before the shot to study the target and backdrop
Prepare for expectations of what you’ll see with a hit or a miss
Depending on your vision, consider more emphasis on plate movement and statistics (how likely you expect to be over or under on your windage).
Take a shot, and freeze to see everything you can, and take a few seconds to process.
Make a measured call, not “a little left,” but “0.2 left of center…”
Take that call to a small plate and test your call.
If it hits – SUCCESS… If it misses, repeat the drill on the big plate and see if you see it better;
You will likely have a better expectation the second time because you just saw a miss in the dirt. That’s ok!
Let that guide your brain to better interpret the information down range this next shot
10. To reset the level of challenge, take the drill to a significantly different distance and repeat the drill.
Rapid Prone Deployment Drill:
The objective here is to force you to build quick and sufficient bipod/bag positions, regardless of what the circumstance. There is a natural mechanical flow to setting an initial rough position and tweaking it to a precision-shot worthy level.
Start with a simple target and shooting surface like a bench. On a clock with time pressure of your choosing, drop gear, build, and shoot. Analyze, tighten time, repeat.
Next level is introduce two targets, and repeat the drill with a significant pan or adjustment within the engagement. Build, shoot, pan, adjust, shoot. Analyze, tighten time, repeat.
Continue to more challenging surfaces like boulders. Flat/simple to start, progressing to rough, uneven, or even shorter length surfaces requiring more meticulous mechanics.
Spend an entire day at some point doing nothing but rear bag work. Move from table, to rock, to weird stuff if you can, leveling up the challenge until you feel quick and comfortable getting into a solid shooting position efficiently.
Remember, perfection is the goal, but settling for “pretty darn good” is often still a very solid spot to be for what we do. On the clock, perfection is rarely achievable…
Free Time:
HIGHLY recommend reverting back to more scope based wind work in second half of day
Mirage is up, changes more frequent, challenge accepted!
Build a tough panning long distance stage, and put in the time to get a specific plan
Make sure you have a plan A, and a simplified plan B using simple additives per target.
Test it out and reverse engineer what you needed, vs what you saw or could improve
2. Obviously feel free to do anything else that needs work – don’t skip the tough stuff!
CONCLUSION:
There are always more drills and beneficial methods you can use depending how you want to attack your focus areas. These are my observations and best ideas for you, but certainly not the end-all-be-all; don’t be afraid to try other things. Again, your experience and abilities have you in a very solid position. The big picture takeaways are:
Improve mental prep so you don’t have to struggle on the clock;
Rip the band-aid off on the rear bag and put in the work needed there;
Drill methodical and meticulous spotting exercises as much as you can during your trips out…
These things are all very achievable improvements! Keep up the mental drive to improve and the gains will come. See below for a bonus list of highlighted items from the curriculum that I want to emphasize before your next trip out. As always, it was such a pleasure getting to hang out with my longest-term PRS buddy. Thanks for coming through again and being part of my training. Of course the door is always open, call anytime! I love catching up and hearing where you’re at with everything…
Thank you and God bless,
Matt Caruso
Caruso Precision
CLASS HIGHLIGHTS AND RECOMMENDATIONS
1. Get out and train sooner than later, lock in what you learned
2. Keep your attention within your thirds, G.O.D.
3. Stick to your processes, in every phase of the day/match/stage/shot sequence; don’t cut corners
4. Drill your weaknesses even if it’s less fun – “don’t skip leg day!”
5. First shot = most important shot… make it perfect!
6. Don’t settle for bad wind angles, use an azimuth or good compass for exact numbers
7. After a stage, reverse math the wind to derive true wind conditions to carry forward
8. Other than checking DOPE, don’t shoot clean steal because it makes you weak
9. IMO spotting is the most important skill beyond having good fundamentals
10. Prepare spotting expectations based on target environment BEFORE you’re on the clock
11. Know your min. correction for edge miss (½ target) and blind miss (¾ target) BEFORE on the clock
12. Plan your toughest target, toughest position as a primary driver of your plan development
13. Review EVERYTHING on your rifle end to end before saying you’re ready for the clock
14. Make mental snapshot of last shot before stepping off. Finish process before chatting with buddies
15. Pause, process, plan, then execute… Do NOT rush downrange analysis
16. Corrections should have a number, not just a direction… “I was left,” vs “I was 0.4 left”
17. Move the bag and rifle separately from position to position
18. Saw into bag before every shot, it becomes muscle memory, costs no time, yields good benefit
19. Confidence = efficient time management. Take the time before the shot, or you’ll struggle afterward
20. Move quick, shoot slow